First campaign guide
Go from verification to your first live campaign
This is the Whistlr business workflow end to end: verify the account, configure Whistlr Plus, upload creative, connect storefront or live surfaces, and launch with the right audience.
Whistlr Plus
Campaign Builder
Objective
Lead gen
Budget
$25 / day
Placements
Lookalike audience
18-34 • Verified businesses
Creative review
Video + headline + CTA
Built around the actual Whistlr Plus flow: objective, audience, placements, creative, and review.
Step 1
Verify your business account
Everything starts with Whistlr Business verification. Complete your business profile, connect Stripe Business onboarding, and unlock Whistlr Plus, Business Suite, and Whistlr Go from one verified setup.
Open Whistlr NetworkBusiness Suite
Revenue & orders
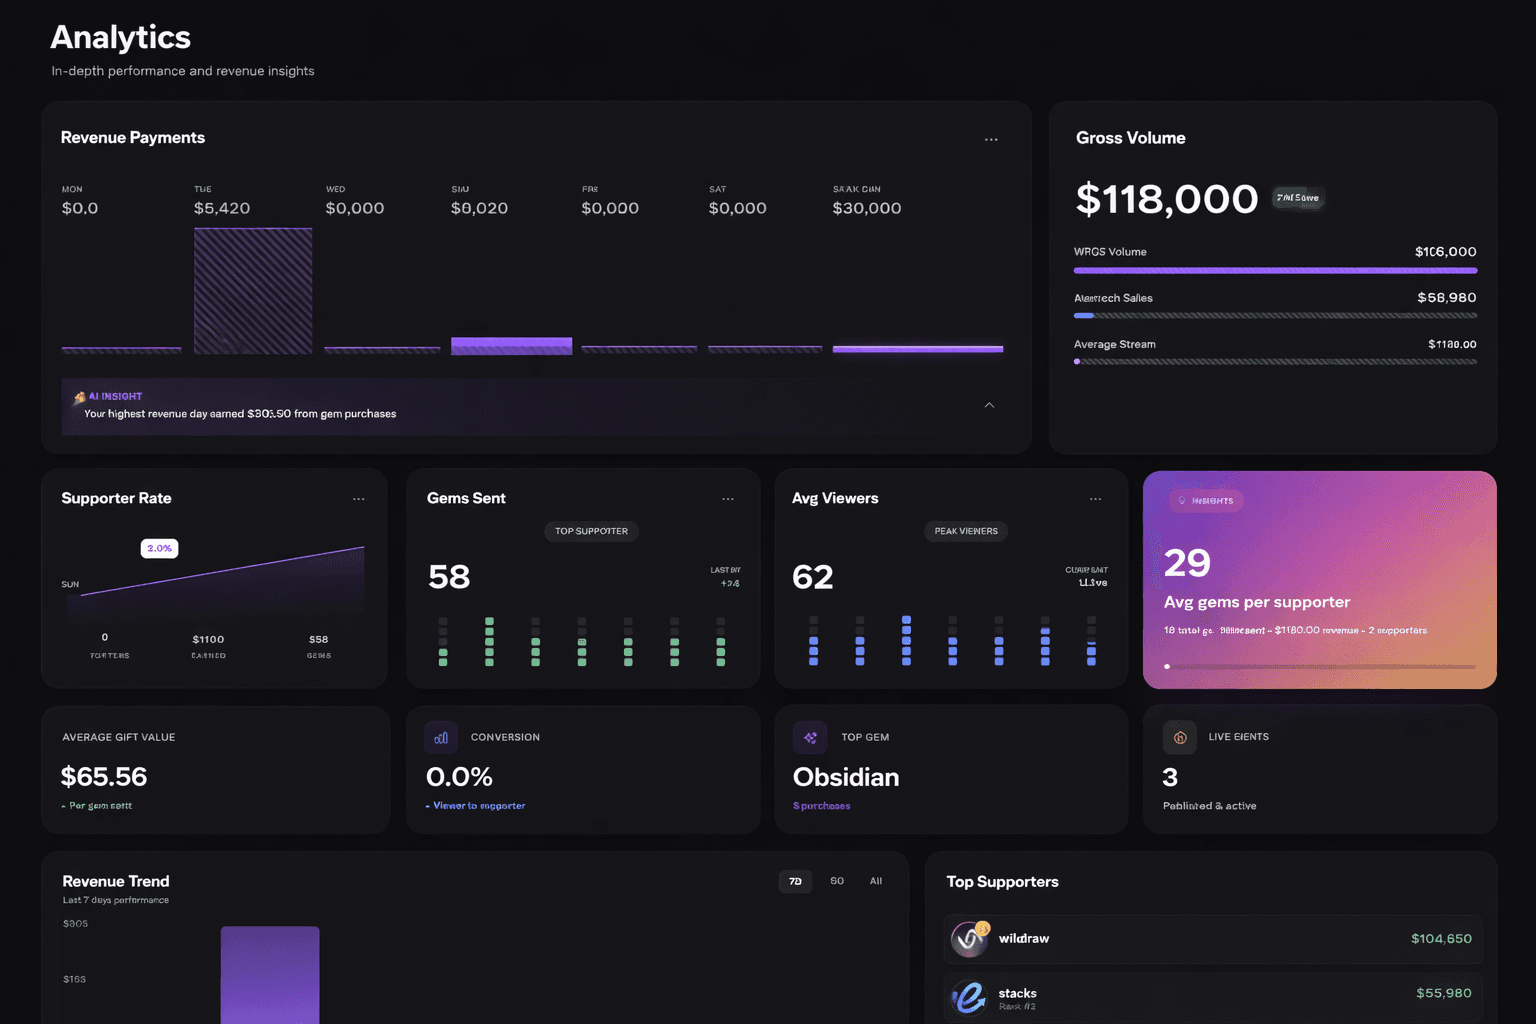
Gross volume
$118K
Avg viewers
62
Live events
03
Uses ETAPX business analytics artwork to represent the verified business revenue surface.
Step 2
Choose the right objective in Whistlr Plus
Inside Whistlr Plus, start with the outcome you need: storefront traffic, native lead capture, product promotion, live session support, or broader awareness. The campaign builder is structured around that first decision.
See campaign setupWhistlr Plus
Campaign Builder
Objective
Lead gen
Budget
$25 / day
Placements
Lookalike audience
18-34 • Verified businesses
Creative review
Video + headline + CTA
Built around the actual Whistlr Plus flow: objective, audience, placements, creative, and review.
Step 3
Build audience signals and placements
Define who should see the campaign, where it should run, and how broad or focused delivery should be. Whistlr Plus supports saved audiences, retargeting, location-based targeting, and placement selection across feed, live, and short-form surfaces.
Explore audience strategyWhistlr Plus
Audience signals
Locations
08
Interests
12
Placements
04
Saved segments
Retail shoppers • 10 mi radius
Nearby + storefront traffic
Warm audience retargeting
Video viewers + site visits
This mirrors the audience, behavior, and placement setup patterns in the actual advertising product.
Step 4
Upload creative and preview every surface
Use the Creative Library to upload approved image and video masters, organize them by campaign, and preview how they will look in feed, story, banner, and live contexts before launch.
View creative toolsWhistlr Plus
Creative Library
Asset queue
launch-hero-cut.mp4
Video • 9:16 master
product-grid-v2.png
Image • Feed square
live-drop-hook.mov
Video • Flow placement
Placement previews
Feed
4:5
Story
9:16
Banner
16:9
CTA
Synced
Reflects the Creative Library, upload flow, and placement preview concepts already present in GrandNational.
Step 5
Launch, sell, and monitor performance
After launch, keep the business loop connected. Route traffic into Whistlr Go, support live selling moments, and monitor revenue, orders, and campaign activity across the Whistlr business surfaces.
See commerce workflowsWhistlr Go
Storefront dashboard
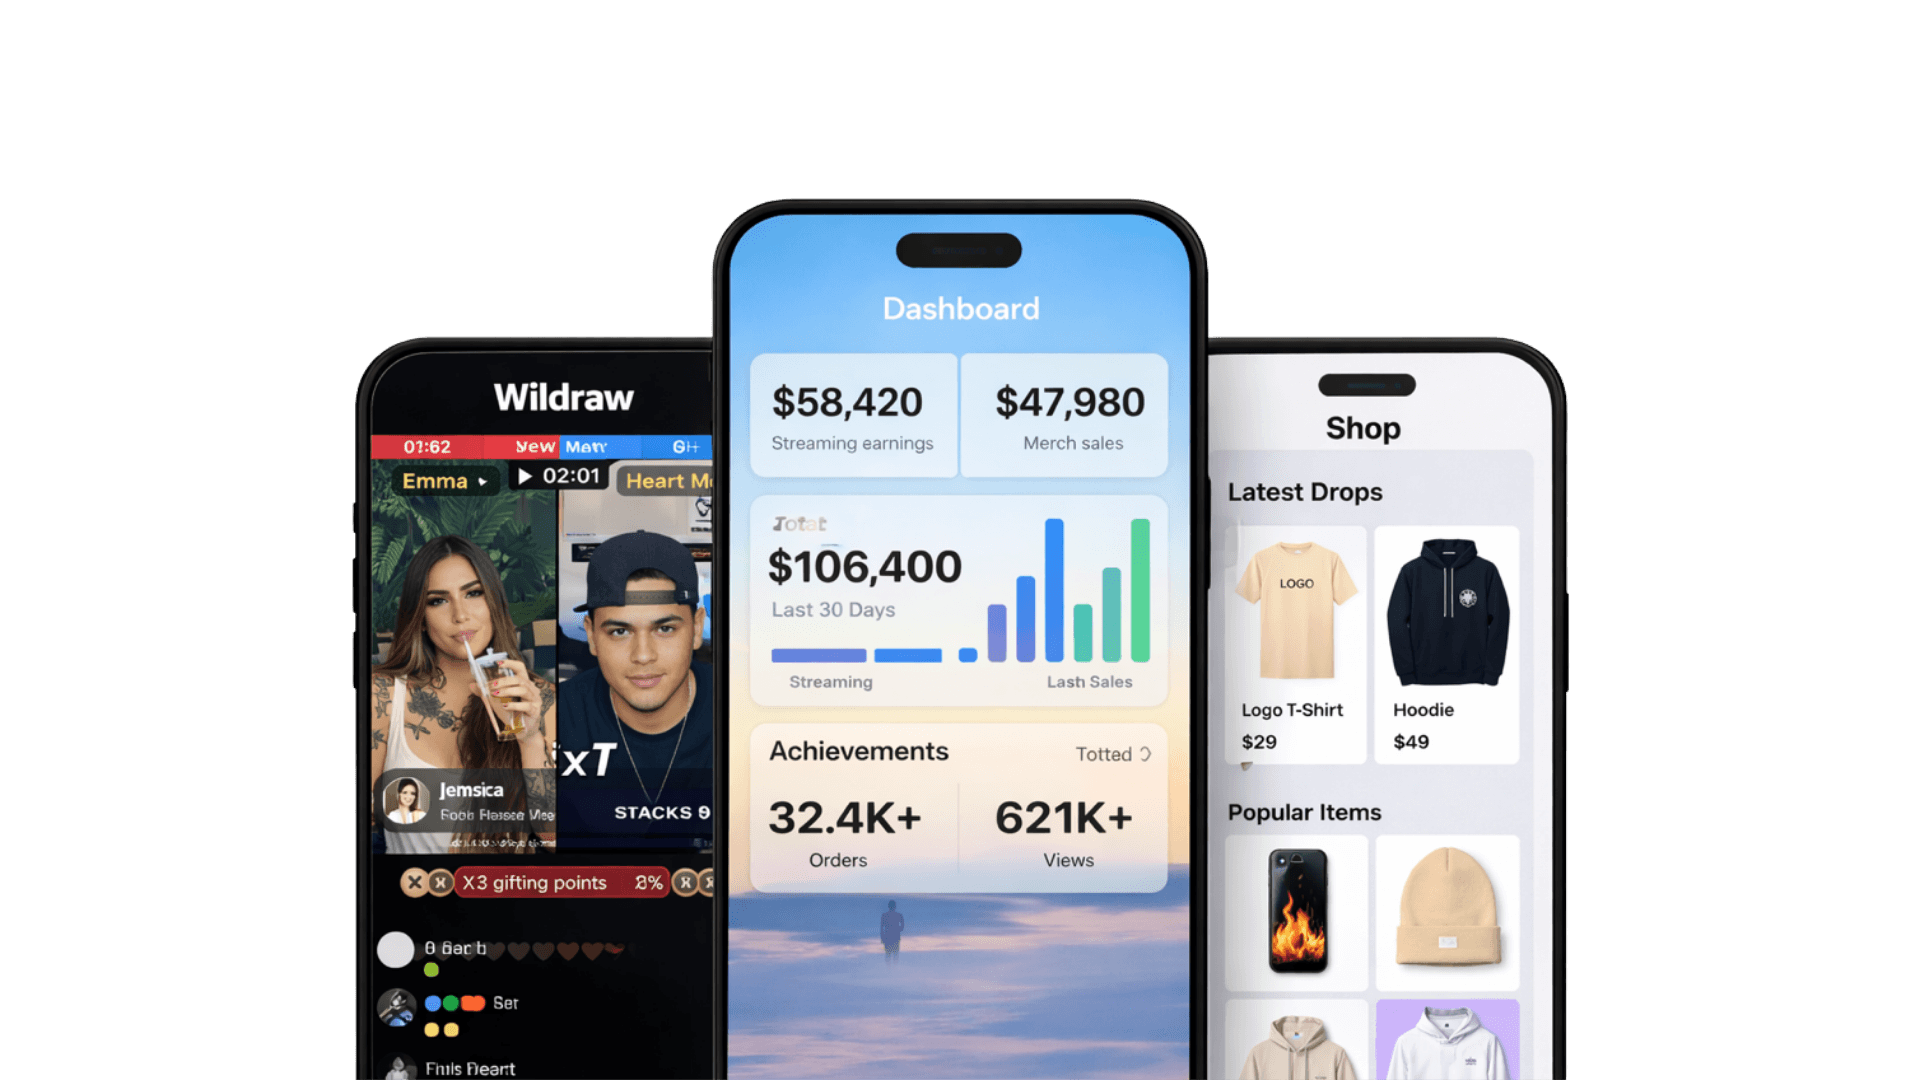
Streaming earnings
$58.4K
Merch sales
$47.9K
Orders
32.4K+
Pairs live earnings, storefront performance, and merch operations from the ETAPX commerce set.
Your questions, answered
Business Help CenterNext step
Start with a verified Whistlr business account
The business workflow starts with verification. Once the account is active, your team can move through Whistlr Plus, Whistlr Go, live monetization, and Business Suite without jumping between disconnected tools.
Step 1
Complete the verified business setup and Stripe Business onboarding.
Step 2
Open Whistlr Plus to configure objectives, audiences, placements, and launch timing.
Step 3
Connect storefront, live promotion, or revenue tracking depending on the motion you are running.
Whistlr Plus
Campaign Builder
Objective
Lead gen
Budget
$25 / day
Placements
Lookalike audience
18-34 • Verified businesses
Creative review
Video + headline + CTA
Built around the actual Whistlr Plus flow: objective, audience, placements, creative, and review.